(related to Problem: A New Bishop's Puzzle)
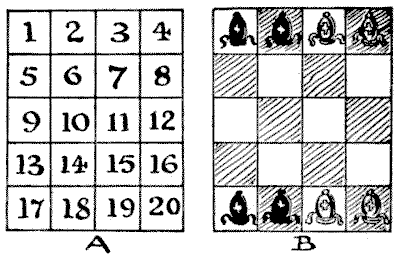
Play as follows, using the notation indicated by the numbered squares in Diagram A:—
| Move | White | Black |
|---|---|---|
| 1. | 18—15 | 3—6 |
| 2. | 17—8 | 4—13 |
| 3. | 19—14 | 2—7 |
| 4. | 15—5 | 6—16 |
| 5. | 8—3 | 13—18 |
| 6. | 14—9 | 7—12 |
| 7. | 5—10 | 16—11 |
| 8. | 9—19 | 12—2 |
| 9. | 10—4 | 11—17 |
| 10. | 20—10 | 1—11 |
| 11. | 3—9 | 18—12 |
| 12. | 10—13 | 11—8 |
| 13. | 19—16 | 2—5 |
| 14. | 16—1 | 5—20 |
| 15. | 9—6 | 12—15 |
| 16. | 13—7 | 8—14 |
| 17. | 6—3 | 15—18 |
| 18. | 7—2 | 14—19 |
Diagram B shows the position after the ninth move. Bishops at $1$ and $20$ have not yet moved, but $2$ and $19$ have sallied forth and returned. In the end, $1$ and $19,$ $2$ and $20,$ $3$ and $17,$ and $4$ and $18$ will have exchanged places. Note the position after the thirteenth move.


This eBook is for the use of anyone anywhere in the United States and most other parts of the world at no cost and with almost no restrictions whatsoever. You may copy it, give it away or re-use it under the terms of the Project Gutenberg License included with this edition or online at http://www.gutenberg.org. If you are not located in the United States, you'll have to check the laws of the country where you are located before using this ebook.